Ford & Mopar Powder Coated Brake Kits - LEED Brakes
Shop by Year Make Model
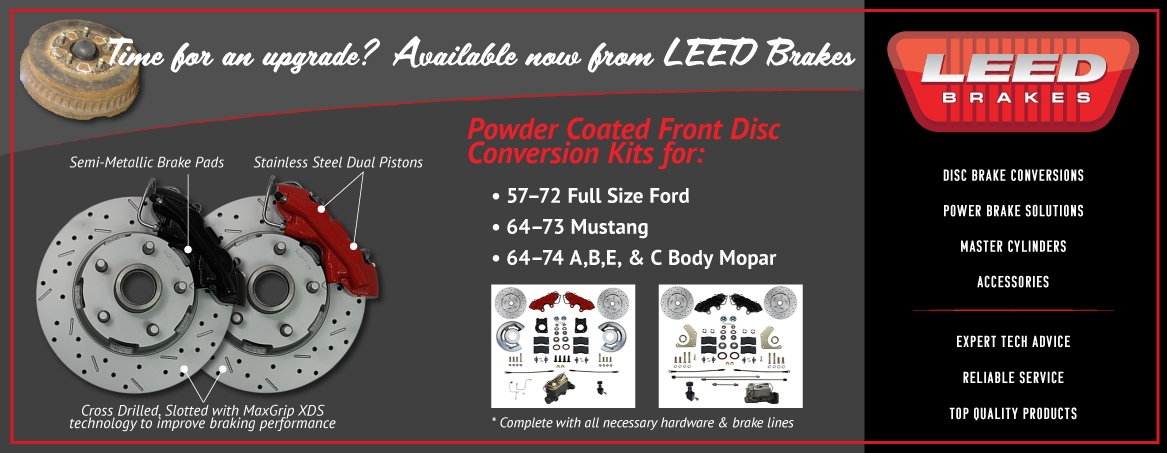
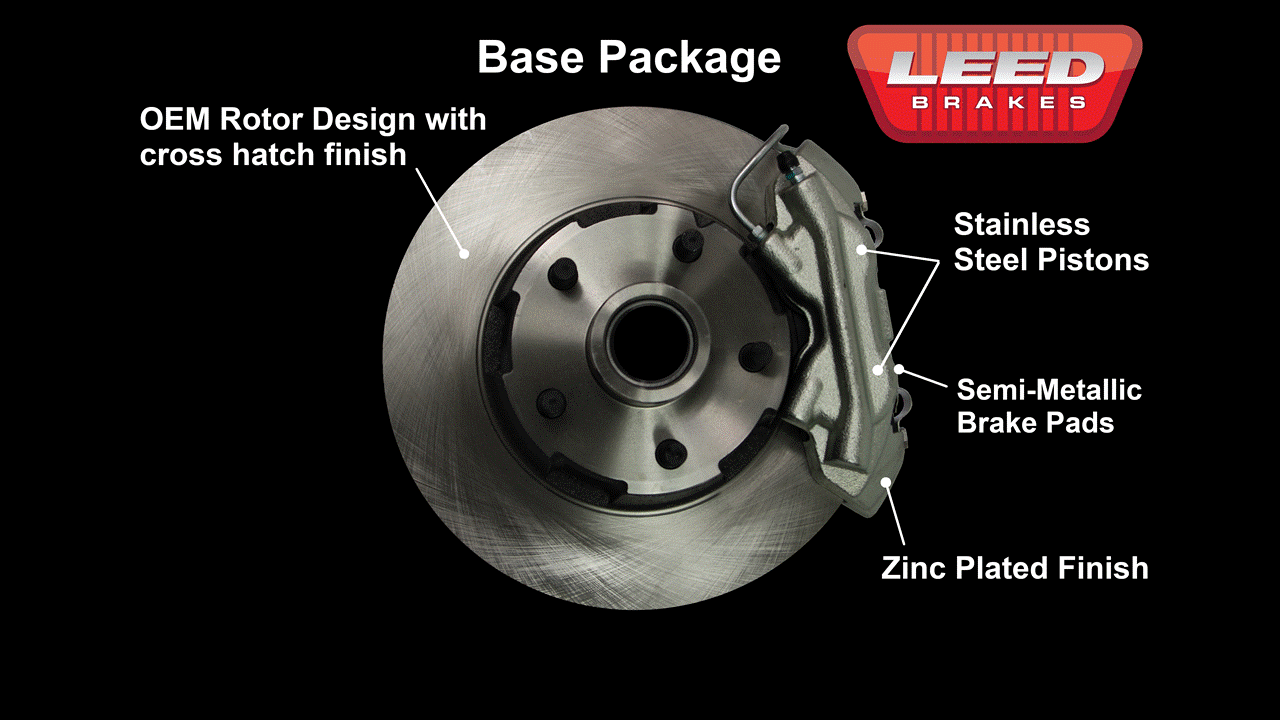
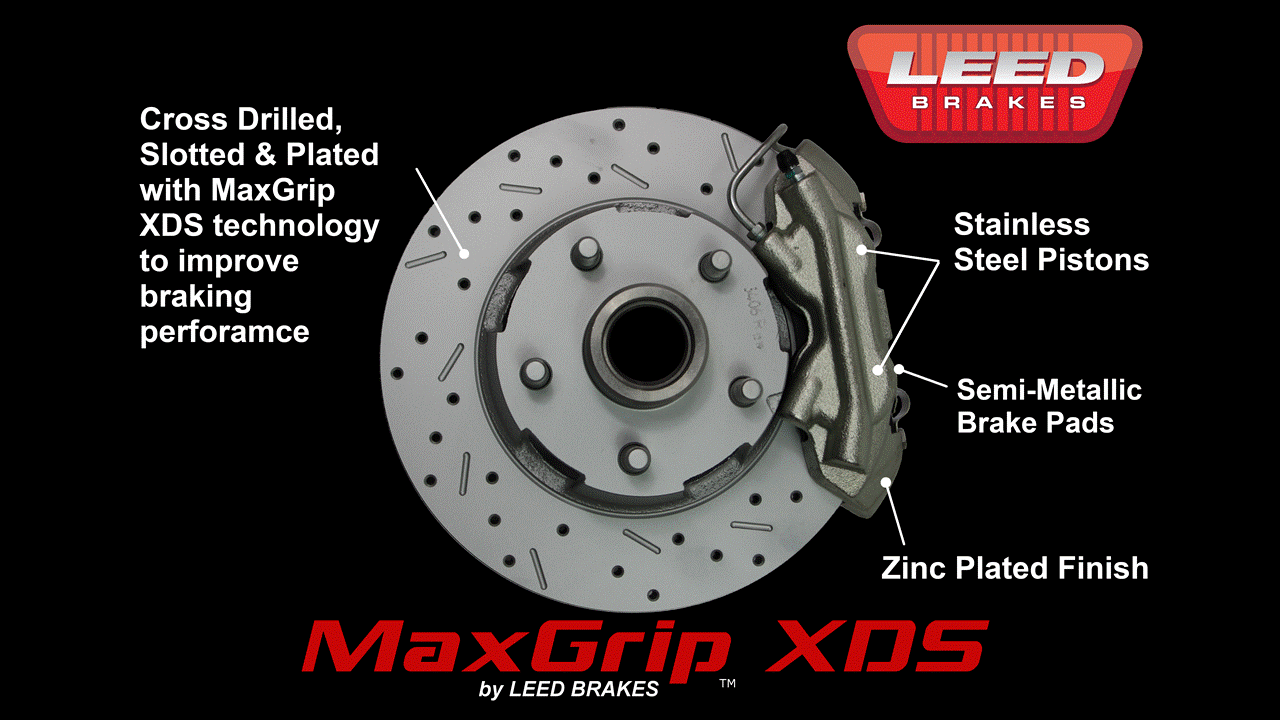
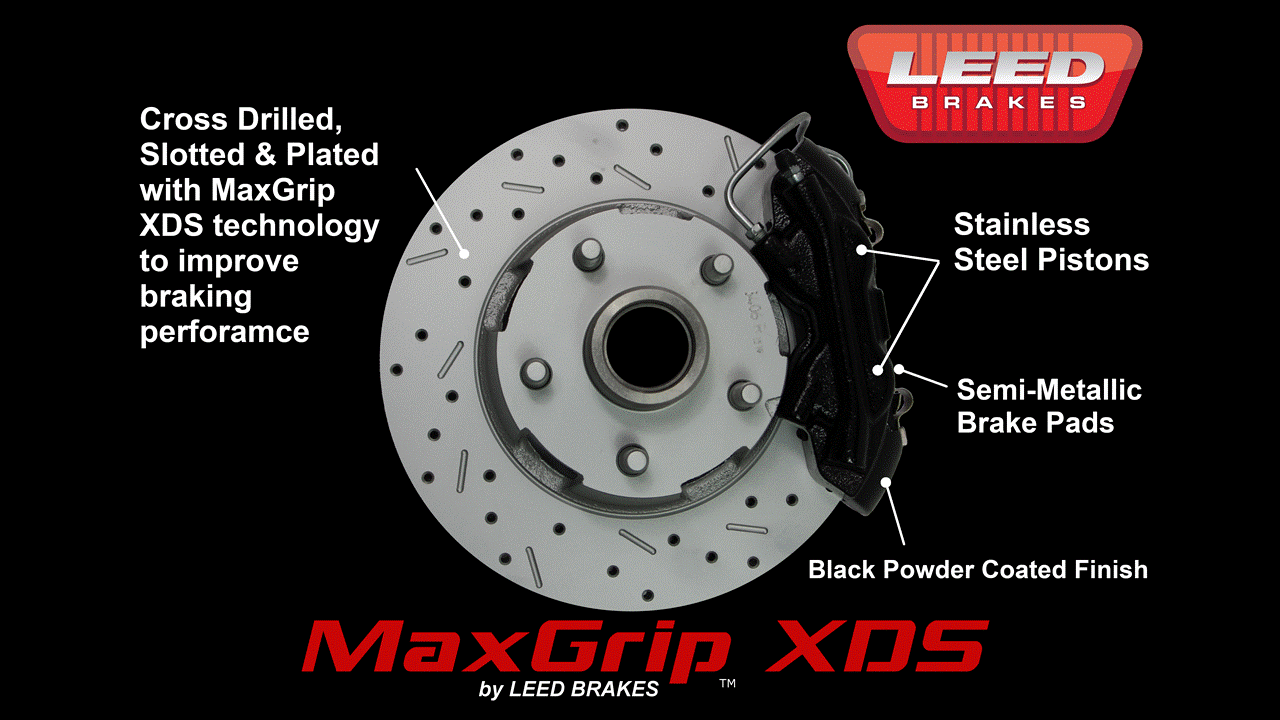
Add some color to your Classic Ford & Mopar Brake System!
You can also select from the Year, Make & Model search at the top of the page to view all of our products for your application.
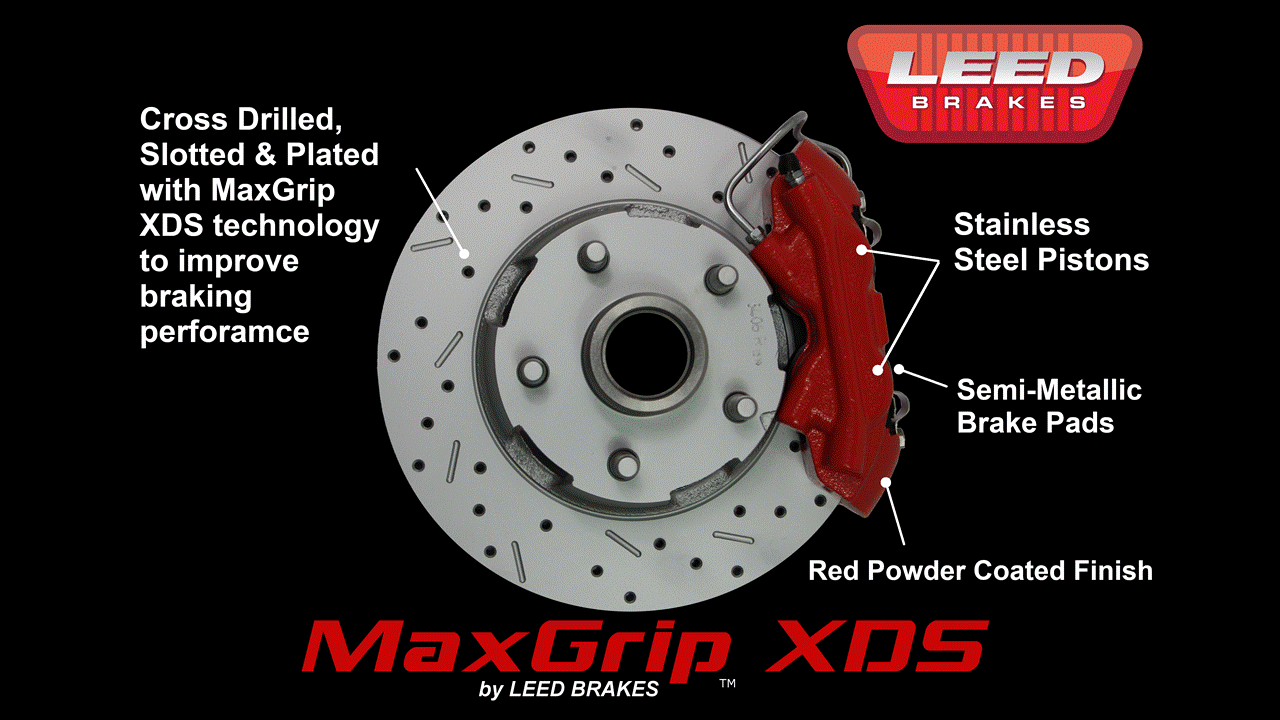
LEED Brakes has released red and black powder-coated calipers as an upgrade to any 64-73 Mustang, 57-72 Full Size Ford or 64-74 Mopar disc brake kit. Just like our standard kits our powder-coated calipers are assembled with stainless steel pistons for life long operation.
The images below show the series of kits that we offer for your application, use the year, make and model search above to find the kit for your application.
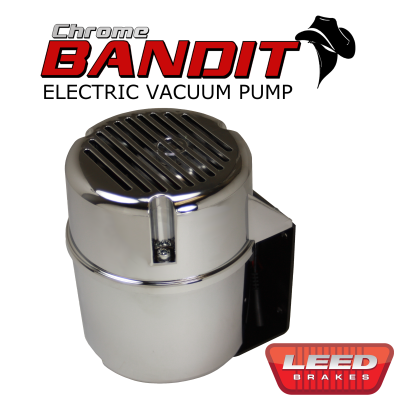
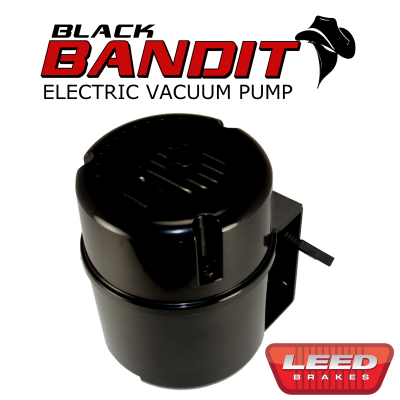
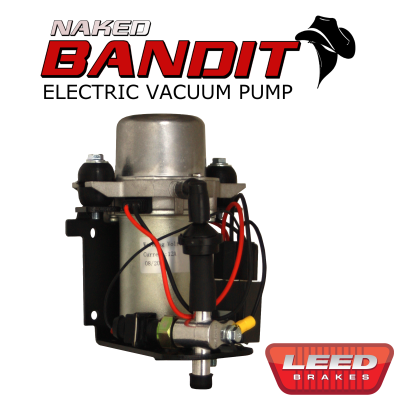
Low Engine Vacuum?
Dont worry, LEED Brakes has you covered! Our Bandit Series Electric Vacuum Pumps! 60% Quieter, 30% More Efficient & 100% Cooler Looking than most pumps on the market today!
Click here for more information on the Bandit Series Vacuum Pumps!
Why LEED Brakes?
- Product Ships Fully Assembled & Pre-wired for easy mounting and 2 wire installation
- Black Bandit and Chrome Bandit Series Pumps give a factory look to your vacuum pump installation
- Black Bandit Canister has a surface that can be painted for your color matching needs.
- Complete installation instructions..
- Stumped on your installation? Call our industry leading tech department to discuss ANY brake questions you may have.
Always test your brake booster vacuum pump for leaks
Vacuum Brake Booster Testing and Diagnosis
Minimum engine vacuum required is 18”HG at idle in gear.
You will need a vacuum pump with a gauge to perform this procedure. Most “chain” parts stores will rent, loan or sell them.
1) Remove vacuum hose from check valve on booster. Place hose from vacuum pump onto check valve and draw booster to 20”Hg of vacuum.
2) Let booster sit with vacuum applied for 5 minutes. Vacuum should remain steady at 20”Hg. If vacuum does not stay steady at 20”Hg the booster it is faulty and will need to be replaced. If vacuum does hold steady at 20”Hg proceed to step 3.
3) With 20”Hg of vacuum in booster depress brake pedal once and release it. The booster should transfer SOME but not ALL of the vacuum. Depending on how hard the pedal is depressed it is normal to see a 5-10”Hg drop in vacuum. The most important thing is to ensure that the booster does transfer SOME vacuum but does NOT transfer all of the vacuum in its reserve. If vacuum remains at 20”Hg OR goes to zero the booster is faulty and will need to be replaced. If vacuum transfer is within the above range proceed to step 4.
4) Once again draw booster down to 20”Hg of vacuum. Depress brake pedal and hold down for 30 seconds. You should see the vacuum gauge drop slightly and then hold steady. Vacuum should stay steady as long as you are holding the pedal down. If vacuum drops while pedal is being held down the booster is faulty and will need to be replaced.